Saturday, May 31, 2014

Graphic 45 Botanical Tea Tag Album

When Graphic 45 first shared the Botanical Tea sneak peeks with the design team, we were all floored! The shabby chic colors, heartfelt sentiments and timeless tea and bird designs were too much for us. I think a bulk of our creations were made with this gorgeous paper!

Botanical Tea also has a special place in my heart because the first time I saw it in person, was the first time I met Graphic 45's owner and head designer, Diane Schultz. I felt so humbled to sit across from this creative great, and to hear her thoughts and inspiration behind this new line. If you're a fan of Graphic 45, I hope you can meet this incredibly kind and imaginative woman sometime. For someone so successful and creative, she is also amazingly modest and loves everyone around her.

I am so grateful to Diane, Charee and the rest of the Graphic 45 family for taking a chance on this newbie and making my papercrafting dream come true! (And to Charee and the gang at G45 headquarters here in Portland, you bet I won't be a stranger. ;)

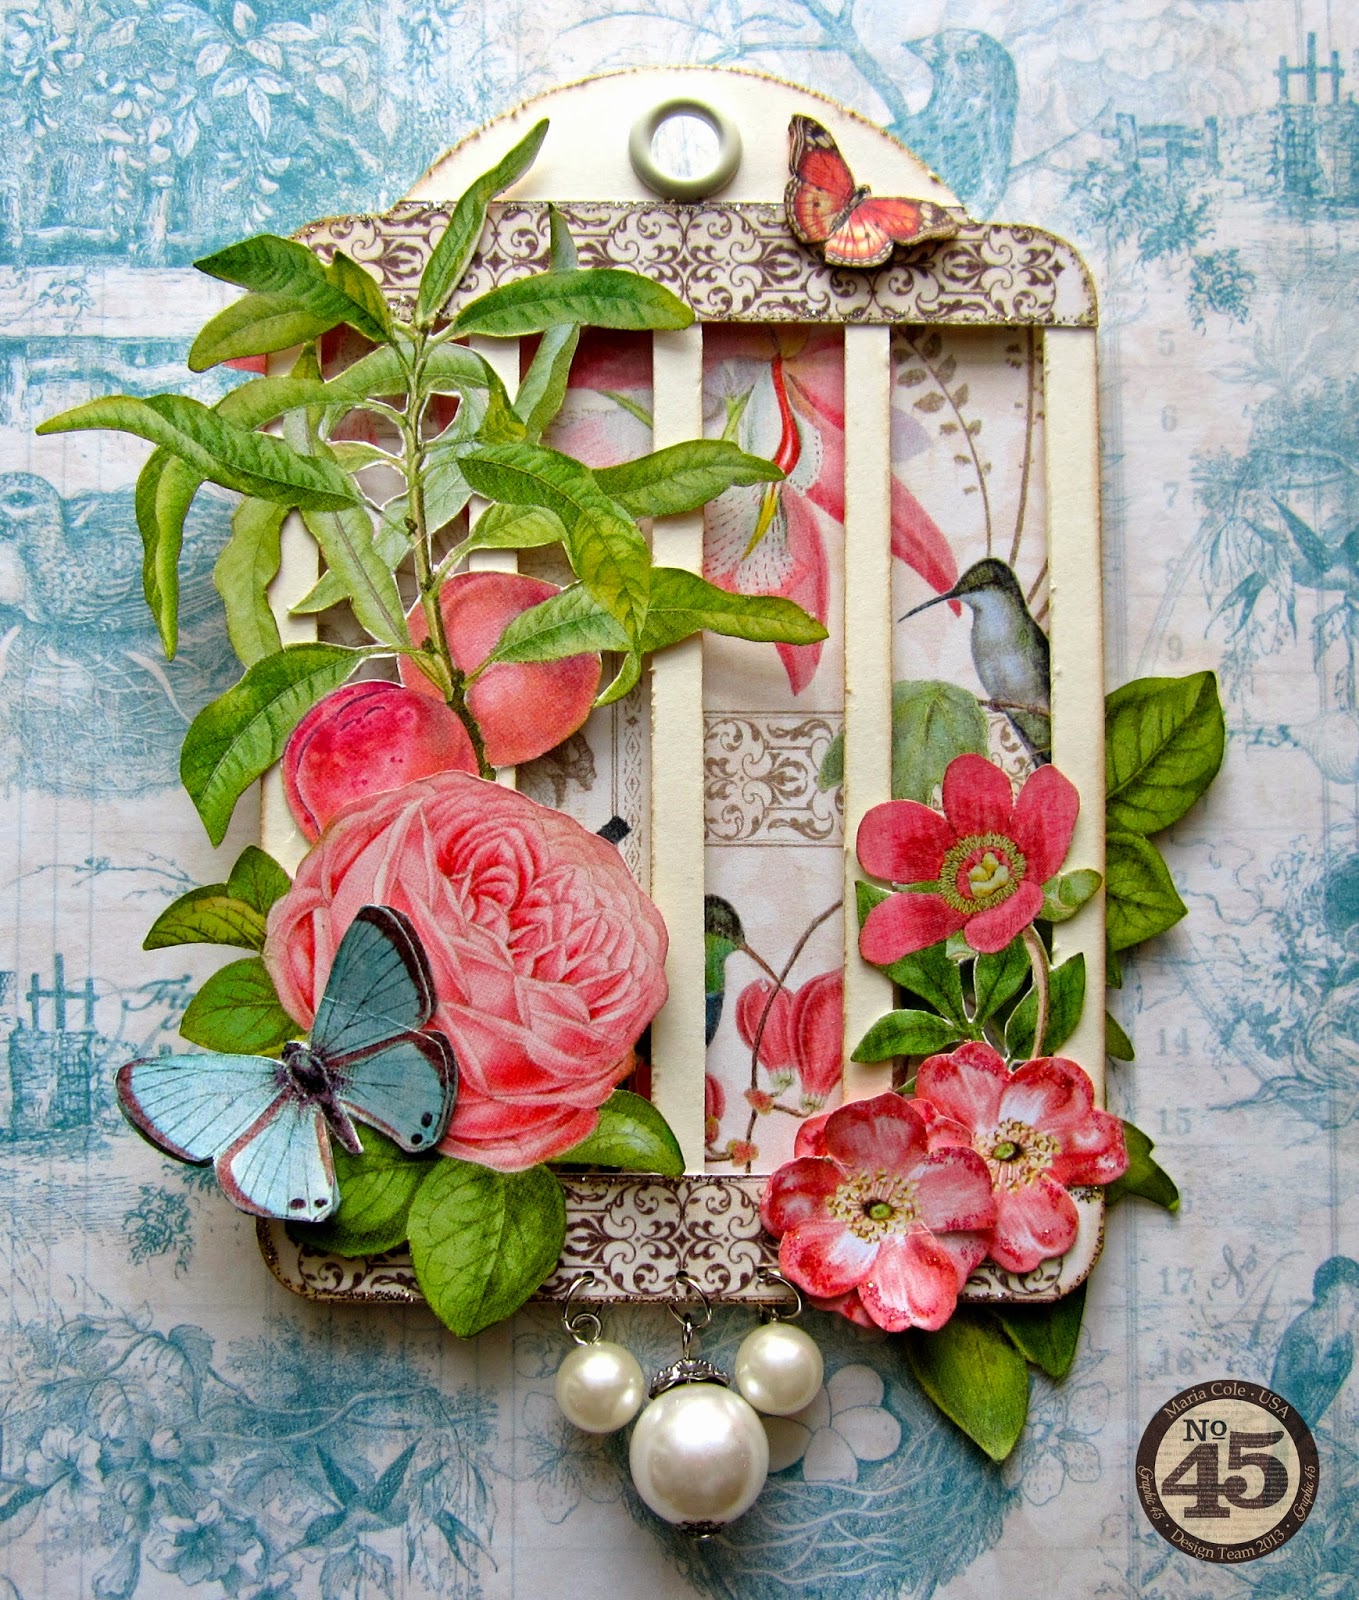
With that said, here is a fun little album I made with Botanical Tea and the gorgeous new ivory tag album. I really wanted the idea of a botanical garden to come through in this mini, so I cut out four rectangles on the front and back covers, then popped up the tag onto paper to resemble a birdcage. I made this project in January, just after our big CHA push.


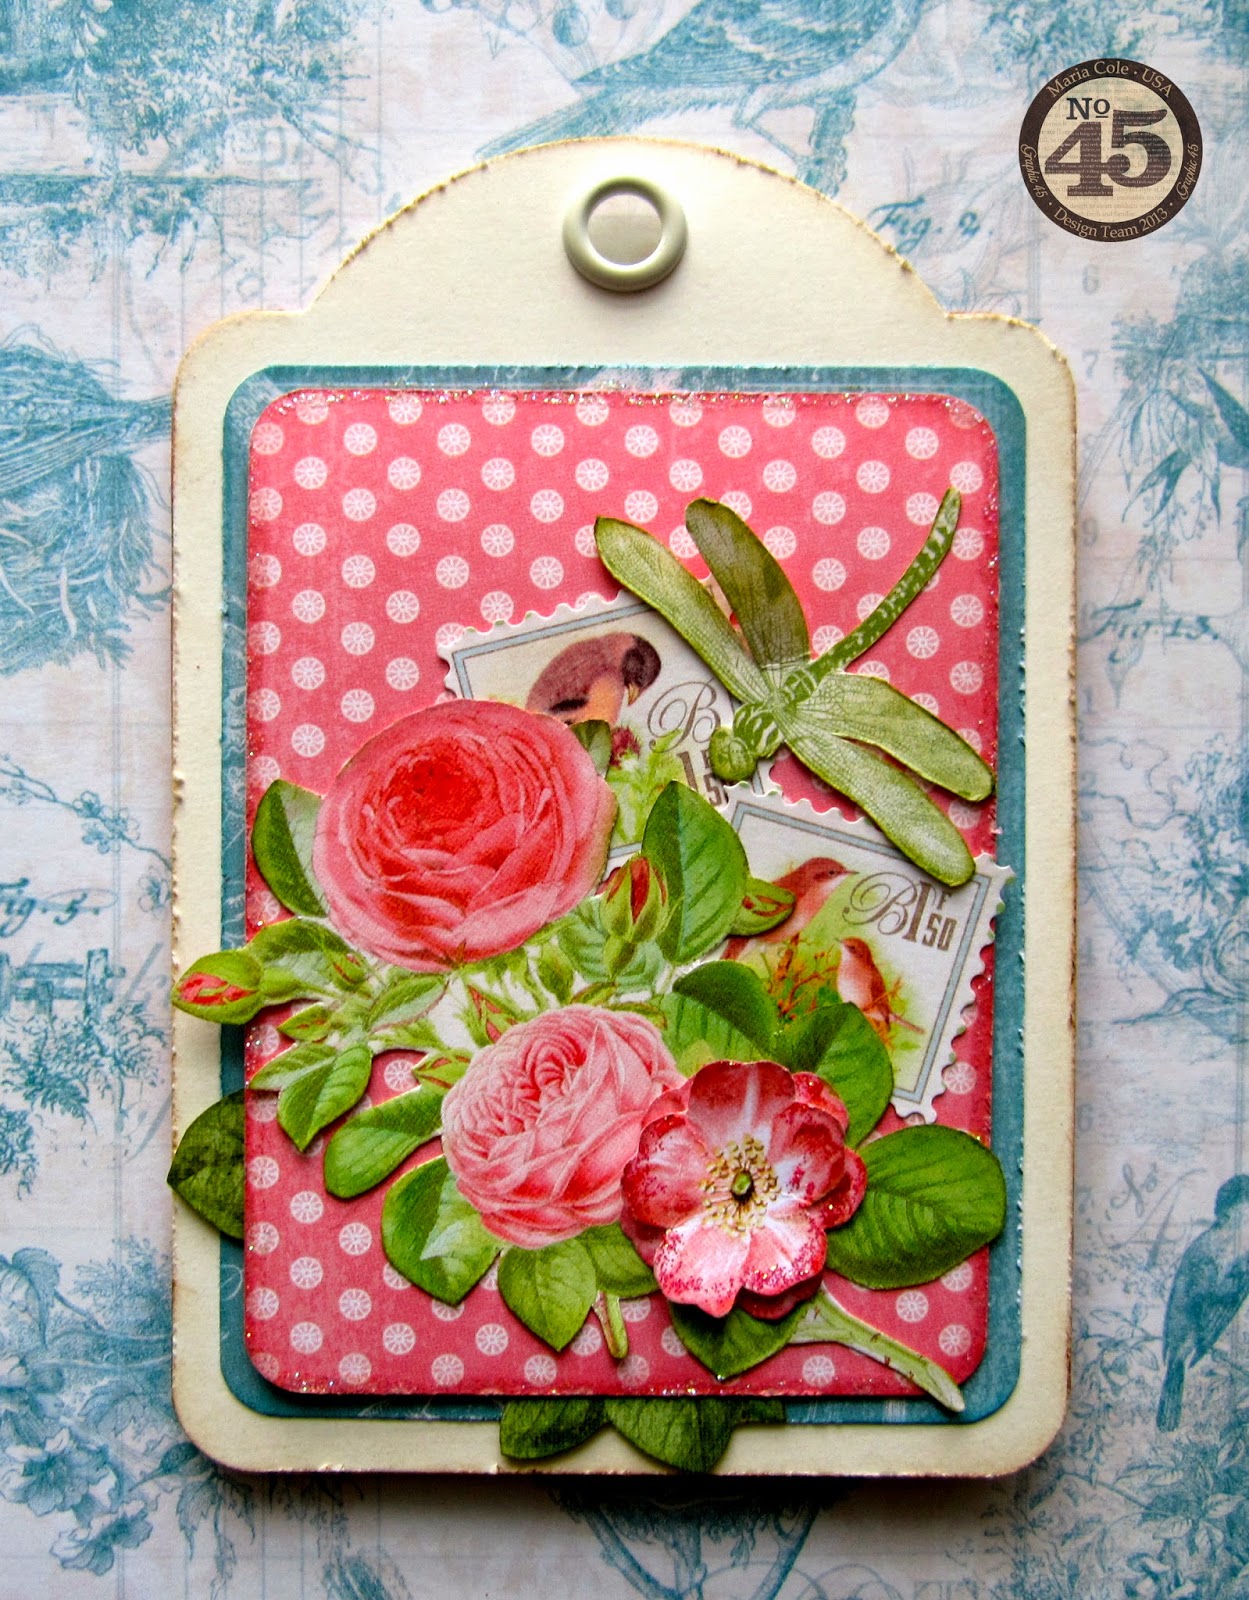
And here is the back.


Supplies


Graphic 45 Botanical Tea Flora
Graphic 45 Botanical Tea Fauna
Graphic 45 Botanical Tea Spring Duet
Graphic 45 Botanical Tea Field of Flowers
Graphic 45 Botanical Tea Robin’s Egg
Graphic 45 Botanical Tea Hello Friend
Graphic 45 Botanical Tea Sweet Chamomile
Graphic 45 Botanical Tea Just Because
Graphic 45 Botanical Tea Love Notes
Graphic 45 Regular Tag Album – Ivory
Gina’s Designs Tea Time Chipboard
Spellbinders Dies – Ovals, Lacey Ovals, Decorative Labels Eight
Tim Holtz Idea-ology Baubles
Stickles – fruit punch, platinum
Jump rings

Thanks so much for stopping by! There are a few more design team projects to share, but I'll spare your inbox for a few days. :)

Good Ol' Sport Tag Album Banner

Hi again! 

Have you ever been to CHA? I was pretty bummed that it didn't work out earlier this year. But, I have a feeling they're going to have these awesome events for years to come. I spent over a month creating projects for Graphic 45's booth in Anaheim this January, including this fun tag album I designed using Good Ol' Sport and the large tag album. 


I was so inspired by the mini pennants in this paper line, that I felt it was only right that I cut my tags into pennant shapes. It's a rather simple mini album, as I didn't want the complexities of each paper design cancel each other out. Charee just informed me that this project (along with a couple other winter CHA goodies of mine) are still on the road traveling, with their next stop in New Zealand!


My favorite part about this album is the back. Just un-do the whole thing, and you get a sporty banner you can hang for some extra team spirit! Thanks for looking ... stay tuned for one more post!


Supplies

Graphic 45 Good Ol’ Sport Teamwork
Graphic 45 Good Ol’ Sport Cheer On
Graphic 45 Good Ol’ Sport All Star
Graphic 45 Good Ol’ Sport Touchdown
Graphic 45 Good Ol’ Sport Big Score
Graphic 45 Good Ol’ Sport Good Ol’ Sport
Graphic 45 Good Ol’ Sport Champion
Graphic 45 Good Ol’ Sport Victory
Graphic 45 Good Ol’ Sport Newsworthy
Graphic 45 Good Ol’ Sport Number 1 Fan
Graphic 45 Alphabet Stickers
Graphic 45 Large Tag Album
Graphic 45 Metal Brads Staples
Tim Holtz Idea-ology ball & chain
Tim Holtz Idea-ology fragment charm
May Arts navy silk ribbon
Spellbinders Scalloped circles die

Graphic 45 Typography Card Tutorial

Project number three of five today! All part of my holding-onto-my-current-design-team-status-for-as-long-as-possible stunt.

This is a simple little card I made using Graphic 45's Typography line, a stunning Spellbinders die and of course, pretty Petaloo flowers. I actually made this back in August 2013 but it got buried amongst so many other DT projects. It's a very quick and simple tutorial - scroll down to see my supply list, photos and step-by-step instructions!


Supplies


12” x 12” Graphic 45 Typography Typography
12” x 12” Graphic 45 Typography Inspire
12” x 12” Graphic 45 Typography Celebrate
12” x 12” Graphic 45 Typography Dream
12” x 12” Graphic 45 Typography Imagine
Graphic 45  Typography Chipboard
Graphic 45 Typography Tags & Pockets
Spellbinders Captivating Squares
Petaloo Dahlias – greys/blacks
Recollections Pearls
Spellbinders Captivating Squares die


Instructions

Step 1. Take Dream paper and cut out all the pieces in the photo.

Step 2. Locate the following pieces from your Typography Tags & Pockets.

Step 3. Find the following chipboard pieces, fussy cut one flower from Celebrate paper, and set aside 2 black flowers. You are free to fussy cut more flowers and add more chipboard and flowers!

Step 4. Take Inspire paper and cut the following: (1) 2 3/8” x 4 3/8”, (1) 3” x 5”, (1) 4.25” x 4.25”. Use a fancy edge punch or die on the 4.25” square piece, such as the Captivating Squares die from Spellbinders.

Step 5. Take Imagine paper and cut off the bottom row, but do not cut the individual images. Score between each image (at 4” and 8”) and fold, so that the back of the crayon box image is face first.

Step 6. Cut the “Write Your Story” image from your remaining Imagine paper. Punch a half circle off the top, then fold paper so that .25” from the back is sticking up. Adhere sides to make a pocket.

Step 7. Open your card to the “Typography” image. Adhere 2 3/8” x 4 3/8” Inspire paper and pocket. Insert tag. Adhere (2) Dream numbers of your choice.

Step 8. Take Dream number border and cut in half. Take one piece, fussy cut flower, chipboard tag, 3” x 5” Inspire paper, and Dream paper. Arrange per photo and adhere.

Step 9. Adhere other Dream number border to far right of Imagine “joie de vivre” image.

Step 10. Flip Imagine “joie de vivre” over. Adhere “Write Your Story” piece to bottom of page. Insert Dream quotes.

Step 11. Flip crayon box image page over. Adhere 4.25” Inspire paper, Dream quote, flowers, and chipboard button per photo.

Step 12. Take Dream flower border and adhere to the back of your card per photo. Take piece from tags & pockets and insert through border. Place foam dots underneath. Adhere the end of the left border to front of card. Fold border on the right over and tuck inside tags & pockets piece. Apply pearls.